Editing photos in Lightroom can be a time-consuming process. But, it doesn’t have to be! With my free travel, Lightroom presets, you can get beautiful bright photos in a matter of seconds on your phone or computer.
I am super excited to share these free Lightroom presets I created to edit my photos quickly with a touch of a button.
This article may contain affiliate / compensated links. For full information, please see our disclosure here.
FREE TRAVEL LIGHTROOM PRESETS
WHAT IS A LIGHTROOM PRESET?
Lightroom presets consist of saved edits with all the photo settings in Adobe Lightroom. They allow you to edit your photos quickly with the selected preset and maybe a few minor adjustments! Consider them like filters you have on your phone.
So say you want to edit a photo you can alter the brightness, shadows, contrast, temperature, and colors to your preference.
For these free Lightroom travel presets you must have the application on your mobile phone or computer.
WHY ARE YOUR TRAVEL PRESETS FREE?
Editing your photos can be a little tricky and very time-consuming. I want others to quickly capture a moment with a few tweaks and beautiful edits with these free presets for Lightroom.
A FEW DEETS ON ADOBE LIGHTROOM INFORMATION
Lightroom On Mobile
Guess what? The Adobe Lightroom mobile application is 100% free. However, it is limited and not as advanced as the computer version for more detailed tweaks for editing. Boo, right?
If you are not using one of those fancy cameras, I suggest taking your pictures from the Lightroom Mobile application. Through the application, you are able to take RAW images that you would get from a digital camera.
RAW images produce a higher quality photo with a higher color range and depth compared to JPEG. However, RAW files are not compressed and take up more space.
You can do this by opening up your Lightroom mobile application and selecting the camera icon located in the lower right corner of the screen.
Now next to the button, you would use to take a picture should be a drop-down menu. Select ‘High Dynamic Range’ and DNG would appear at the top of the application Tada now you can take pictures in RAW format.
Lightroom On Computer
For Adobe Lightroom on your computer, there is a monthly subscription you have to pay, which is around $10 per month. In my opinion, it is worth every penny. The computer version also comes in a bundle with other applications included such as Photoshop and more if you want to expand your editing skills. I have to say this is an awesome bargain!
Get more details on pricing, plans, and signing up right here.
HOW CAN I GET MY FREE TRAVEL LIGHTROOM PRESETS?
You can get my travel presets for free, yes free! I am including 3 presets ready to use in one click.
All you need to do is subscribe to my blog in the subscription box below. Make sure to check your spam folder if you notice my confirmation email is taking a while to pop into your inbox.
Once you received your email, download your free travel Lightroom presets. Below I got the details to download your free travel presets so you can begin having some editing fun!
HOW TO SAVE LIGHTROOM PRESETS
Yay, so you have downloaded your freebies now and need to import your Lightroom presets so you can get to editing your photos.
HOW TO IMPORT LIGHTROOM PRESETS FOR COMPUTER
Lightroom Classic Version
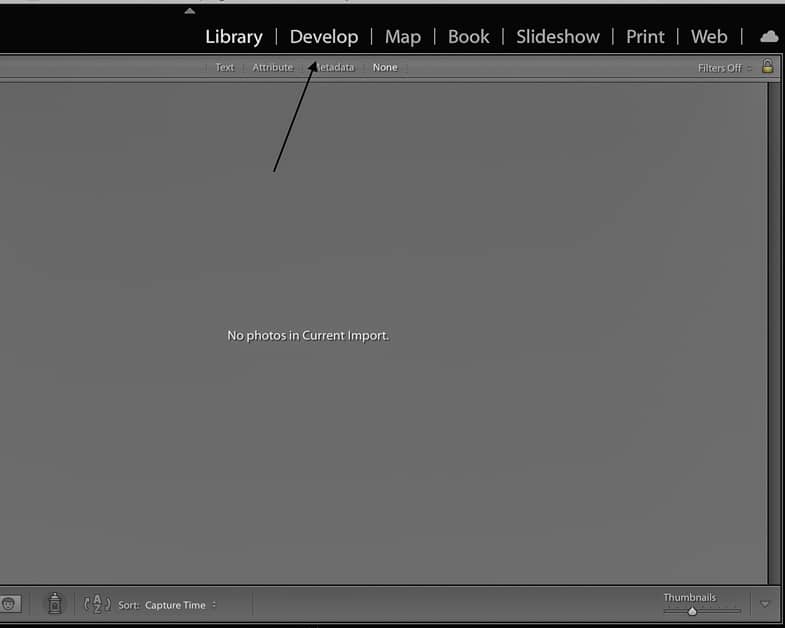
1|After you download and save your zip files on your computer, open your Lightroom Classic application on your computer. When the application is open select the “Develop Module.”
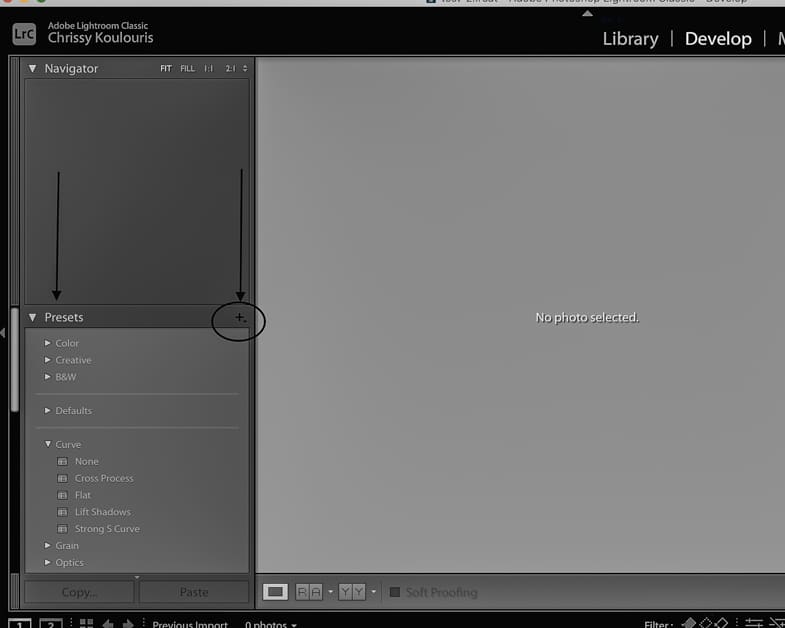
2| Scroll down the panel on the left side of the screen until you see “Preset
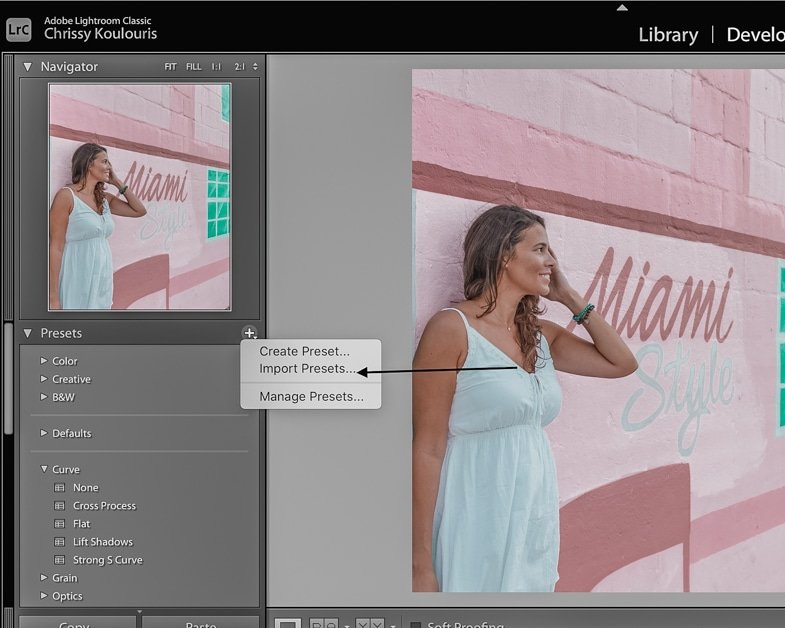
3|Click on the plus sign and a menu will appear select “Import Presets.”
4|From there find where you downloaded my .xmp files and click import.
5|Once imported scroll back down to “Presets.” Your presets will be under the “User Presets” tab if you did not select another location for them.
If they don’t appear right away, exit and relaunch the Lightroom application. When is reopens go back to the “Develop Module” and they will be waiting under “User Presets.”
Lightroom CC Version
1| Download and save your files on your phone or computer. Began by opening your Lightroom CC application on your computer. Lightroom CC will look more like the mobile application.
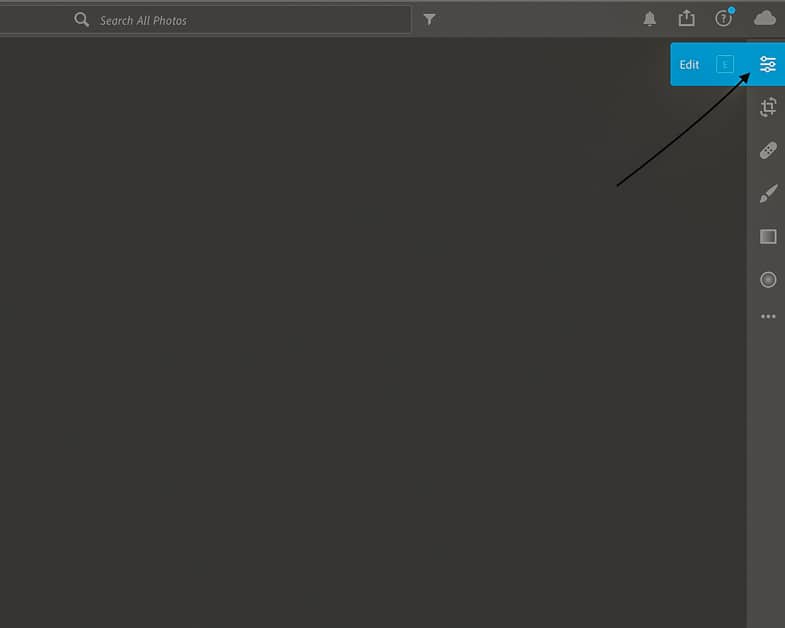
2|When the application is open select the three sliders pictured above in the top right-hand corner.
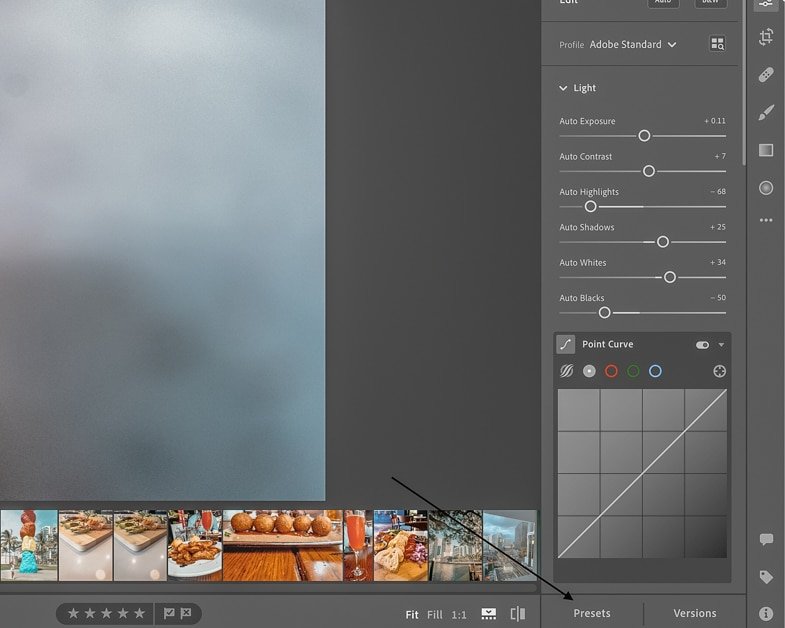
3|Next, click on “Preset” located on the lower right of the screen.
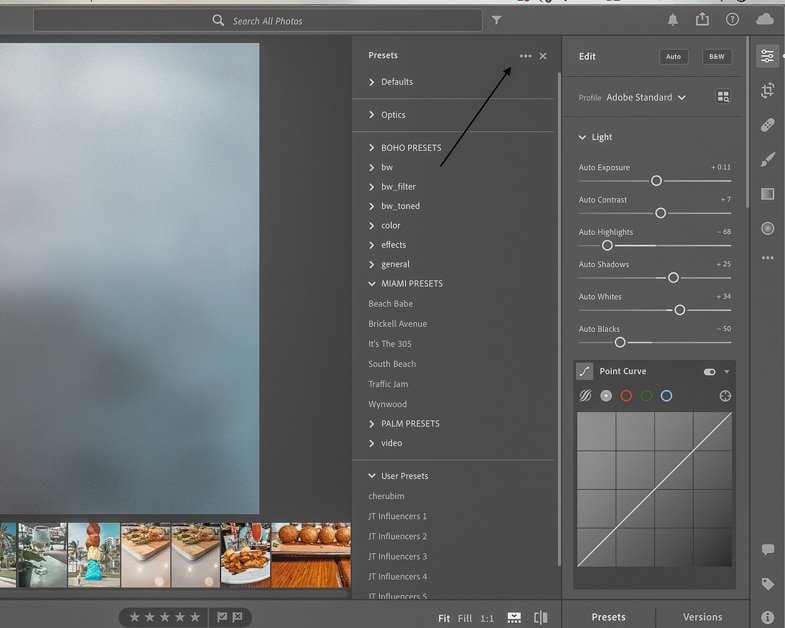
4|A menu will pop out to the left. Next to the label presets you will see 3-horizontal dots that you need to select.
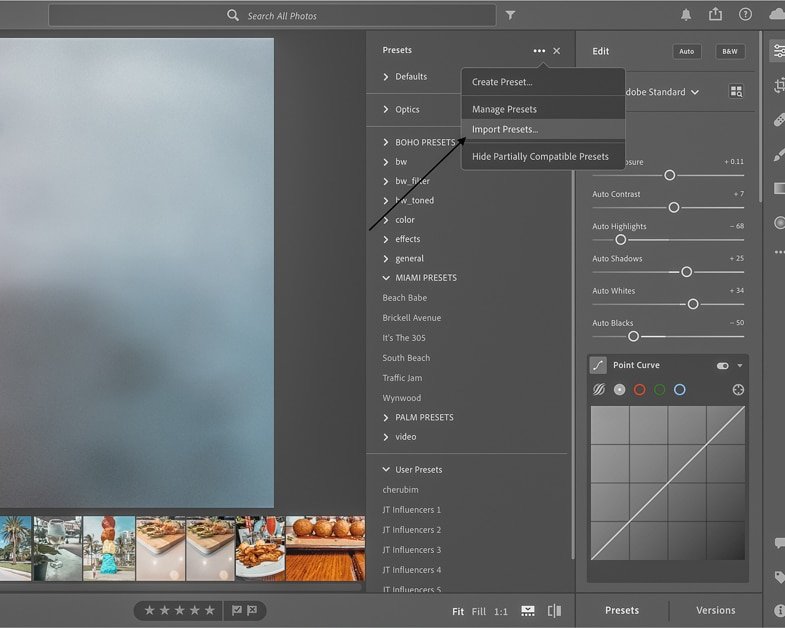
5|Click on the “Import Presets” and select the .xmp presets you downloaded and hit that import button.
Your new presets will be located under the presets menu.
If you used this version of Lightroom, it is cloud-based and your newly imported presets will already appear on your phone.
See installing Lightroom presets on the computer is easy peasy!
INSTALLING LIGHTROOM PRESETS ON MOBILE
Lightroom presets for mobile come as DNG files which are directly downloaded to your phone. So download your 3 presets in DNG files and save them into your phone so we can add them to Lightroom.
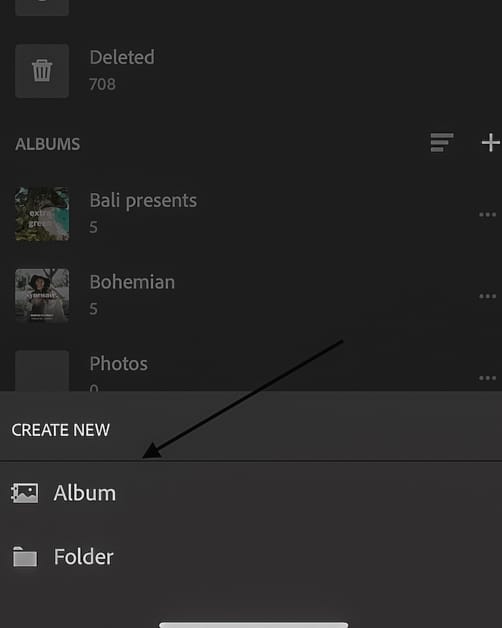
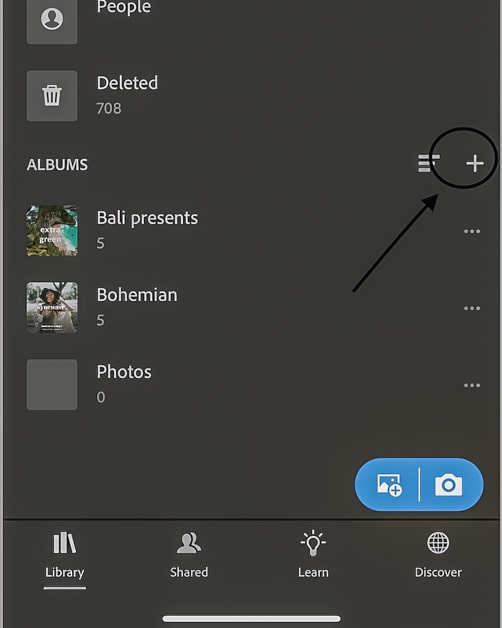
1|Open the Lightroom application so we can create an album so you have your presets. Select the plus sign and a menu will appear. Select the “Album” option.
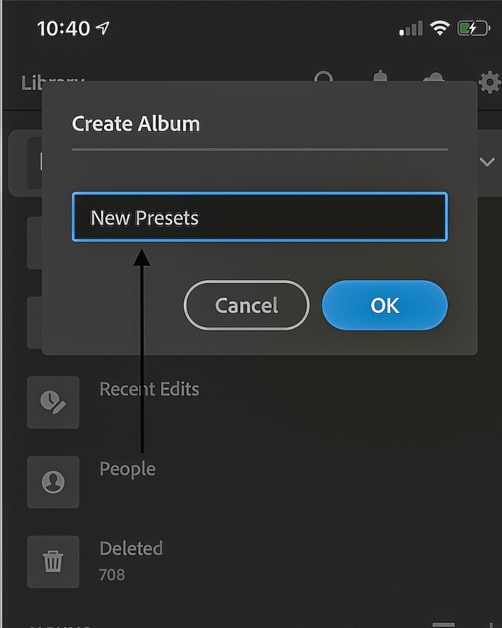
2|Next you will be prompted to title your new album. Once you gave your new album a cool name select “OK.”

3|Next to your new album you will see 3-horizontal dots that you need to select.
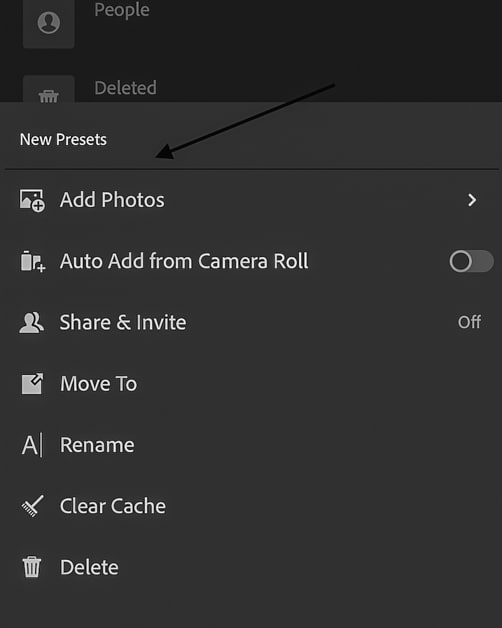
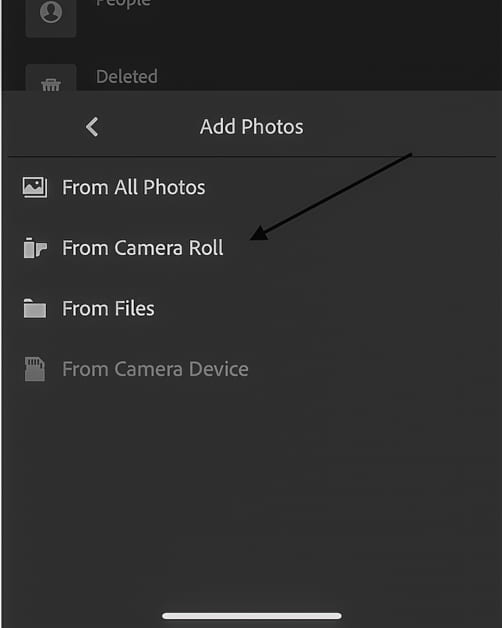
4|From there click on “Add Photos” then in the new menu that appears select “From Camera Roll.”
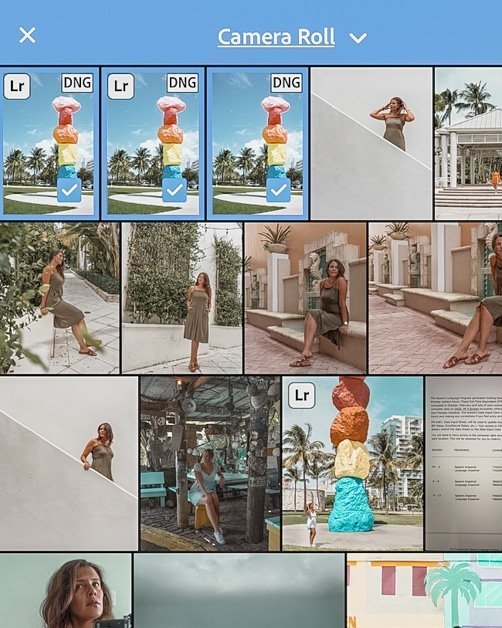
5|Select all the presets you just downloaded from your email and choose “Add.”
HOW TO USE YOUR LIGHTROOM MOBILE PRESETS
So now I am going to show you how to use Lightroom presets on your phone.
1|Go back to the new album you just created and imported your new DNG files.
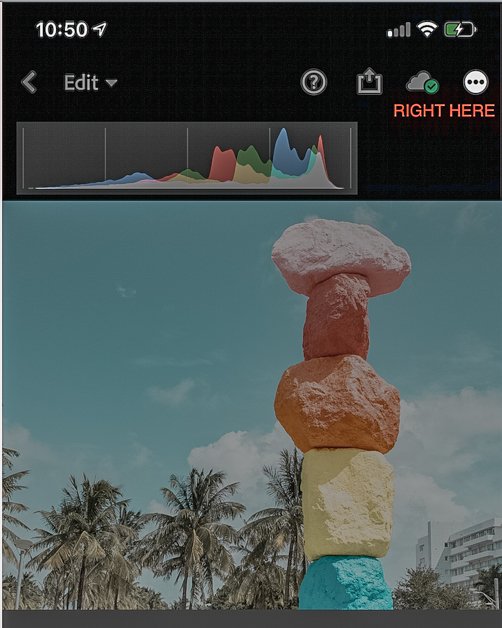
2|Select your first file to begin creating a preset and tap on the 3 horizontal tops in the top right corner of the screen.
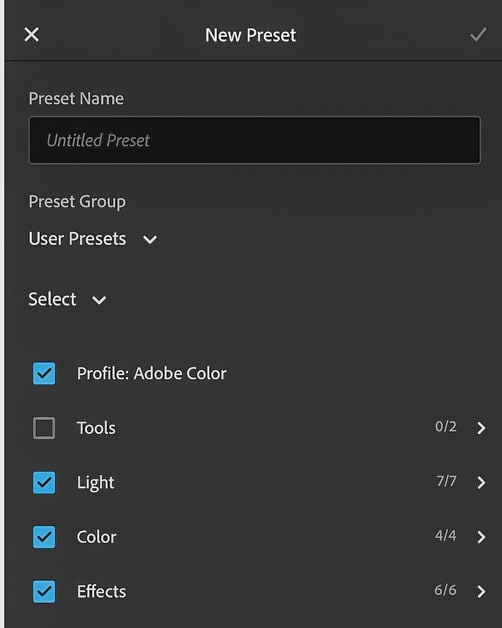
3|A menu will appear and tap on “Create Preset.” You will be prompted to label your preset, which I highly recommend you do! Add it to a Preset Group you have already or create a new one.
4|When done in the top right corner of the screen select the checkmark.
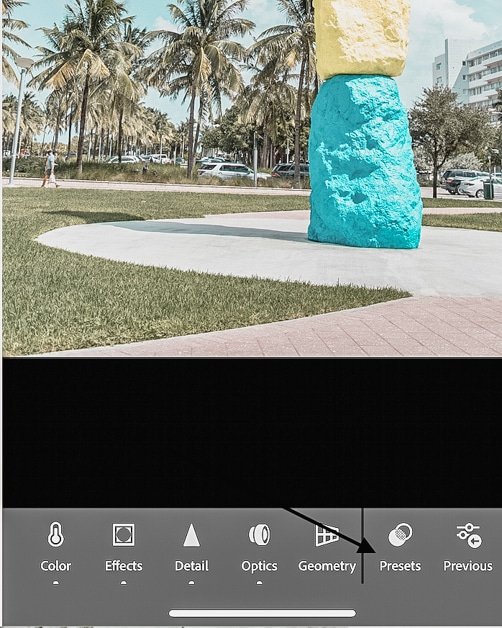
Now you can quickly edit your photos by selecting the “Presets” button on the lower screen.
WHAT YOU CAN DO WITH YOUR FREE TRAVEL LIGHTROOM PRESETS
Below I have some edits done with the free preset pack you’re getting. Keep scrolling and you can check out my before and after shots with my Brighten My World presets.
PRESET 1 | WIEN WE MEET AGAIN
A preset that has lower exposure and is perfect for pictures taken during the day with harsh light. This happens frequently while living here in Miami.
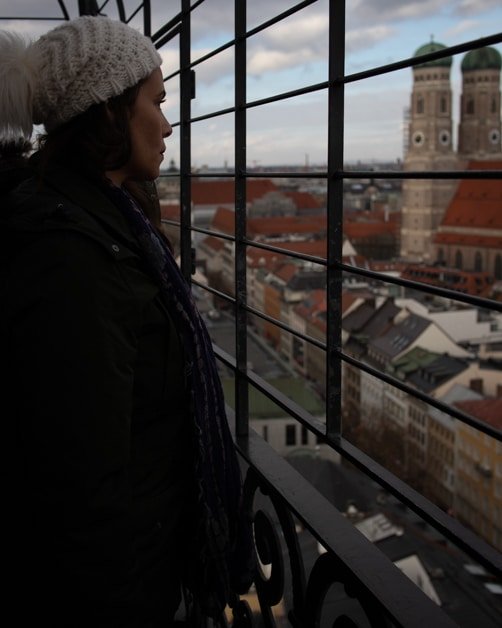
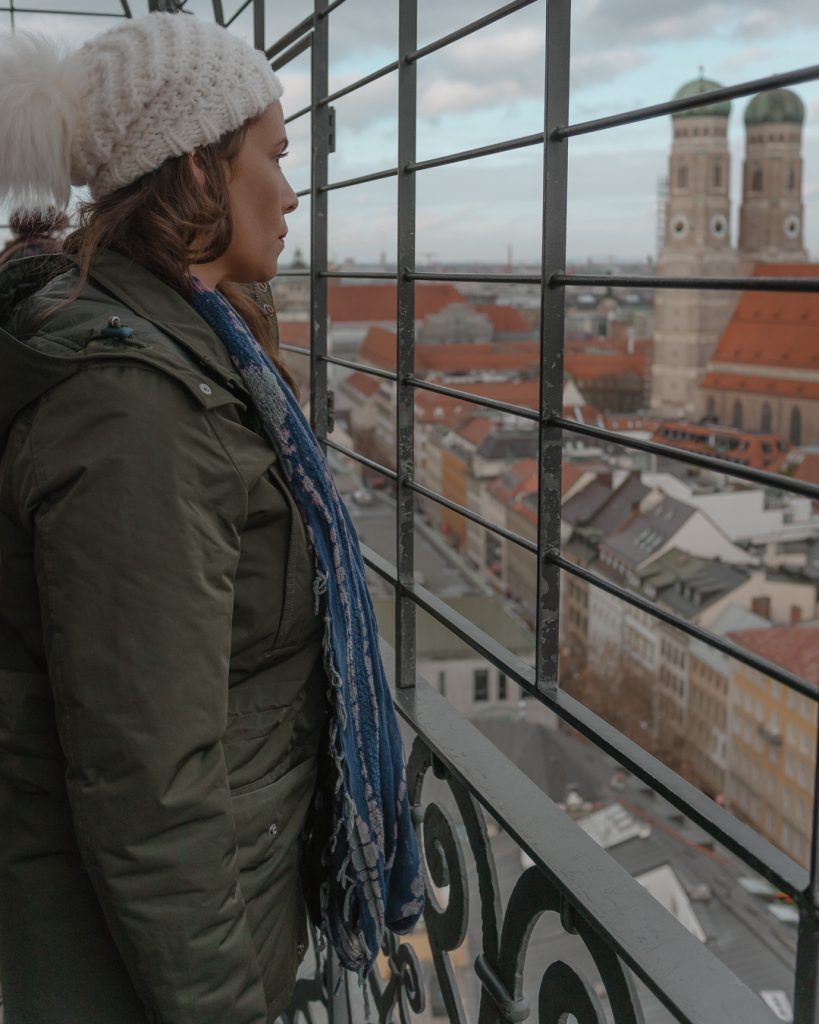
PRESET 2 | COM-MUNICH-CATE
Bright, soft, and airy preset. Perfect for the beach or a European vacation like me below spending a winter vacation in Munich.
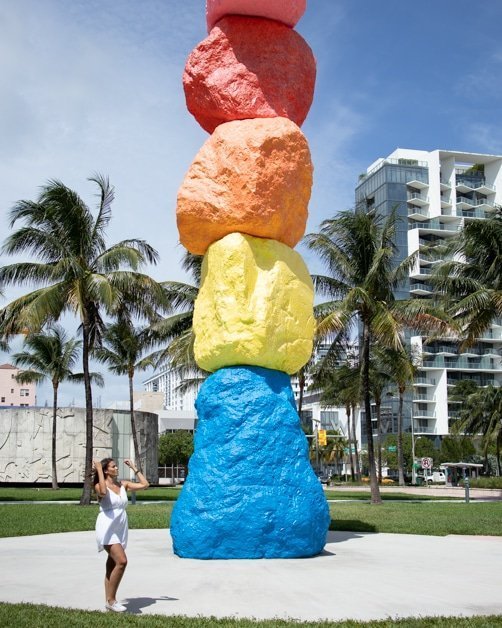
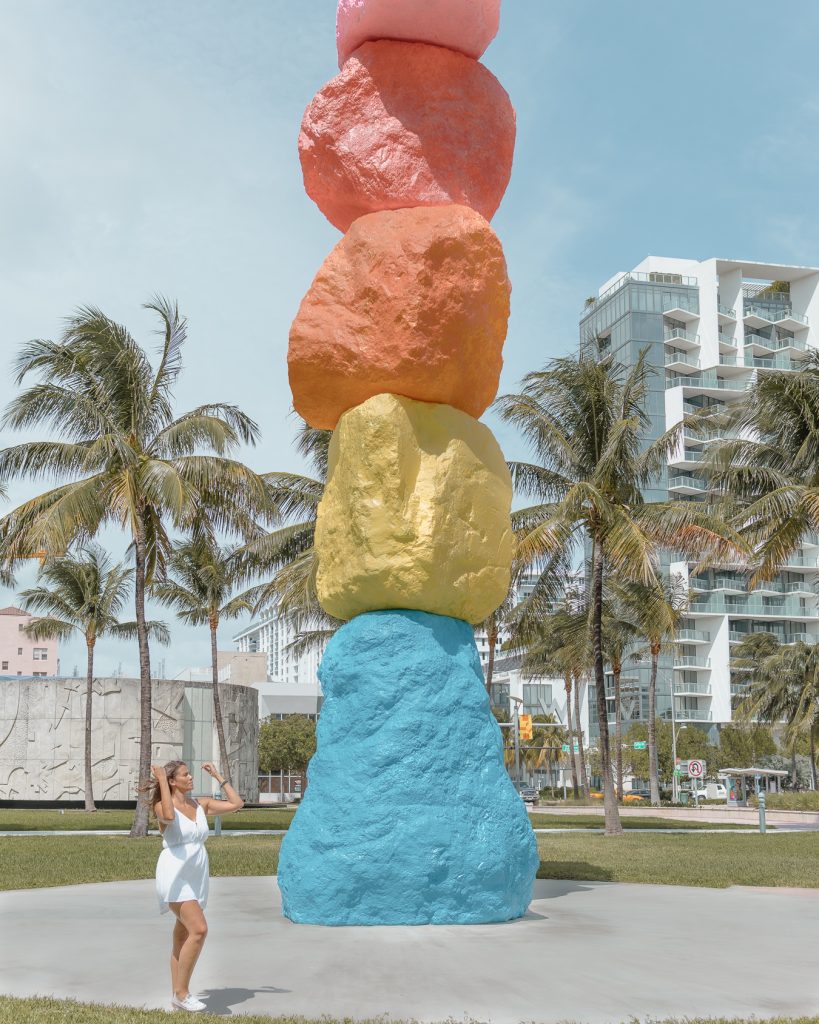
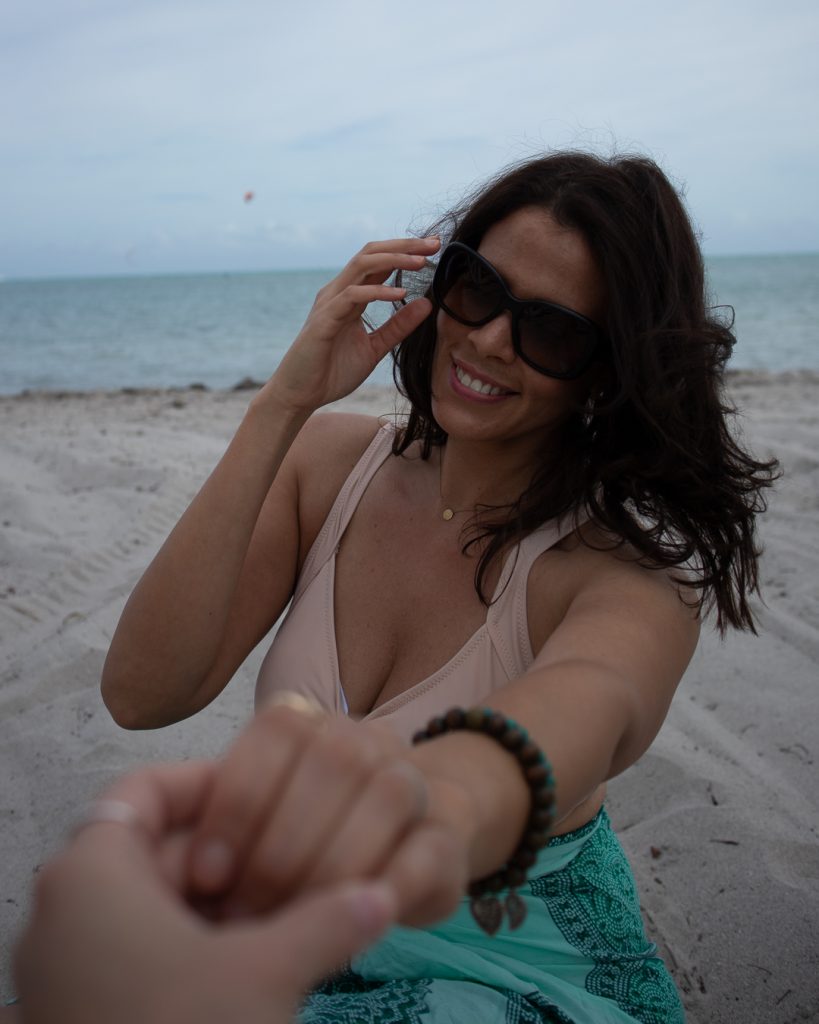
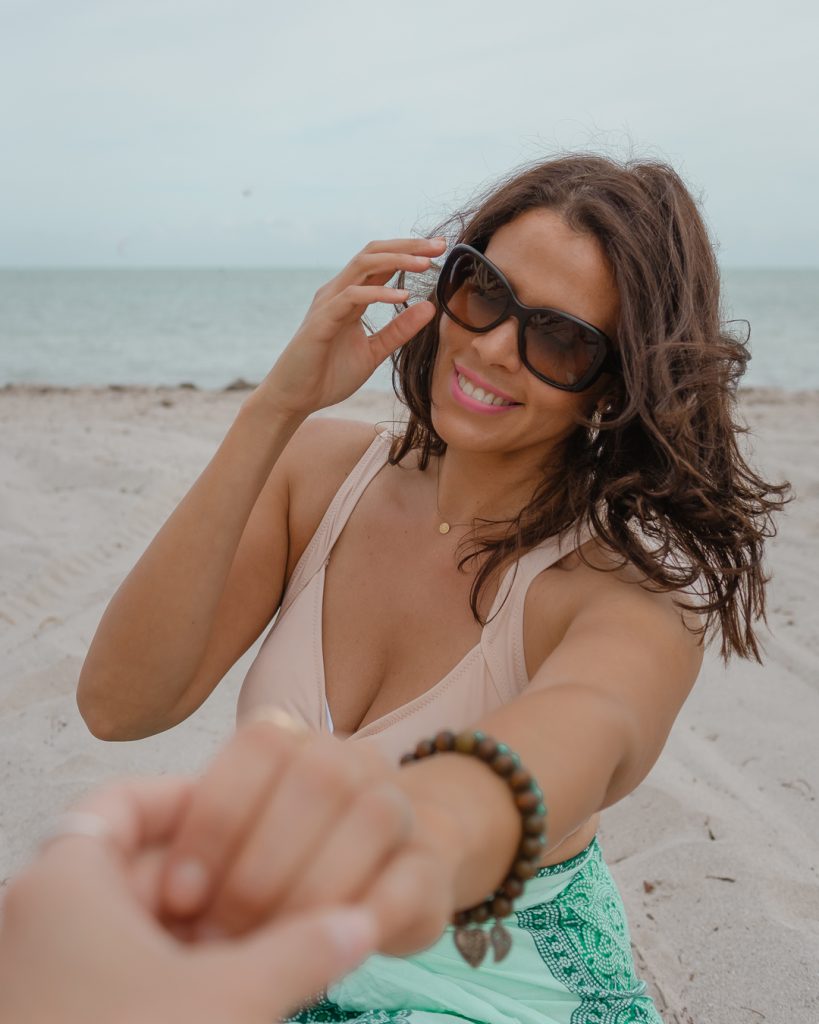
PRESET 3 | DUBAI YOU A DRINK
Dubai you a drink is preset that is great to instantly brighten underexposed pictures, like the before picture I took in Miami Beach.
HOW TO ADD FINISHING TOUCHES TO YOUR TRAVEL LIGHTROOM PRESETS
Temperature: If the photos is too warm or cold, adjust the slider to your preference. I prefer a little cooler pictures, with just a smidge of warmness.
Colors: If the colors appear to be vibrant or muted adjust the saturation and vibrance until the colors appease you!
Too bright or dark: Try adjusting the contrast, highlights, shadows, blacks, and whites by a tad. If it is still not to your liking then play around with the exposure last. To keep all your photos consistent, you just need to adjust the sliders a little bit.
Skin Tone: If the skin tone seems unbalanced play with the oranges and reds in the HSL tab.
ENJOY YOUR FREE TRAVEL LIGHTROOM PRESETS
I hope you enjoy your newly download free travel presets and using them with your travel photos. If you have any questions about the presets please leave a comment below or send me an email.
OTHER POSTS YOU WILL ENJOY:
- How To Plan A Trip Using Google Maps
- Carry On Essentials To Pack For Long Flights
- How To Take Care Of Your Skin While Traveling
- 66 Effortless Traveling Hacks
Like this post on my free travel Lightroom presets? Share it with others or pin it for later!


I love free presets! These ones look great on your photos, I like when they make the shot brighter.
Oh thank you so much Krista. So glad you like bright photos too!